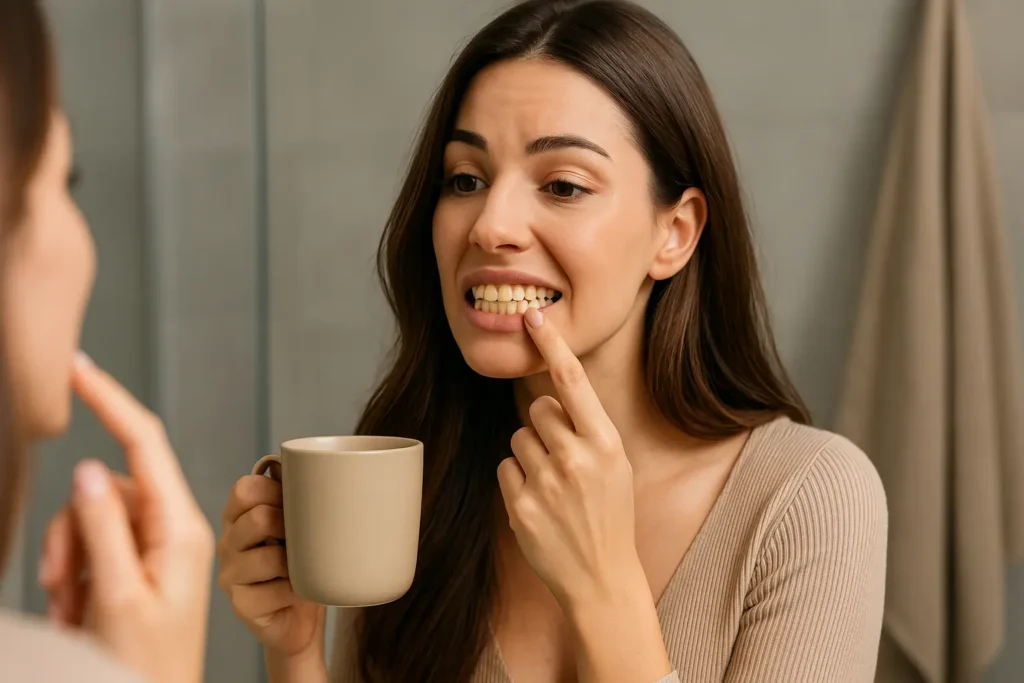
You know that quiet moment before a photo — when you smile, then hesitate just a little? Maybe you tilt your head, wondering if your teeth look as bright as they used to. 😬
You’re not being vain — you’re being human. In a world of constant video calls, social photos, and daily coffee rituals, smile confidence is emotional currency. And when your teeth start to dull, it’s not just about color — it’s about how you feel when you look in the mirror.
If you’ve searched “best teeth whitening” lately, you already know the flood of options: whitening strips, LED lights, pens, gels, dentist visits, miracle claims. Everyone promises perfection. But which one actually works — and what’s safe for your enamel?
That’s exactly what this guide is for. 💬
We’ll walk through the science of stains, the truth about professional vs. at-home whitening, and the emotional side of the journey — the confidence that comes when your smile finally matches how you feel inside.
Why Teeth Lose Their Sparkle (and Why It’s Not Your Fault) 💛
Let’s start with the heart of the matter: why do teeth change color at all?
Think of enamel as a glossy, translucent shield. It’s tough — harder than bone — but also porous, like a fine piece of ceramic. Every sip of coffee, every glass of red wine, every bite of blueberry pie leaves behind tiny color particles that sneak into those microscopic pores.
☕ Everyday Life, Everyday Stains
- Coffee & Tea: Chromogens (pigment molecules) attach to enamel like magnets. The darker and more frequent your drinks, the deeper the tint.
- Red Wine: Contains both chromogens and tannins — double trouble. Tannins make enamel more adhesive, helping stains stick longer.
- Tobacco: Tar and nicotine create that unmistakable yellow-brown tone that’s almost impossible to brush away.
- Colorful Foods: Curry, soy sauce, and berries are natural culprits too.
These are called extrinsic stains — surface-level discoloration that whitening treatments can lift effectively.
Then there are intrinsic stains — deeper changes within the tooth’s structure. These can stem from:
- Aging (as enamel thins, yellow dentin becomes more visible).
- Medications like tetracycline or antihistamines.
- Trauma (a hit to the tooth can trigger internal darkening).
- Genetics — some smiles simply start more ivory than white. 😊
Understanding which kind of stain you have helps you choose the right treatment — and that’s where professional insight really matters.
The Science of Whitening: What’s Really Happening
Whether it’s a high-end dental laser or a home LED kit, whitening relies on one key mechanism: oxidation.
Hydrogen peroxide (or carbamide peroxide) breaks down into oxygen molecules that penetrate enamel and react with colored pigments, making them invisible to the eye. 🧪
- Professional gels are stronger (up to 40% peroxide).
- At-home gels are gentler (5–15%), designed for gradual use.
Here’s the critical distinction: the chemistry is the same — but the control and precision are not.

Option #1: The Professional Whitening Experience 🦷
Imagine walking into a calm dental office. The air smells faintly minty. You’re reclined, a soft bib across your chest. Your hygienist explains every step, and you feel both curious and safe.
That’s the heart of professional whitening — expert control and instant transformation.
Step-by-Step What Really Happens
- Examination First
Your dentist checks for cavities, gum recession, or cracked enamel. Whitening gel in those spots could sting badly — so this step protects you. - Gum & Lip Protection
A cool, rubbery gel barrier coats your gums and lips. This layer keeps the strong peroxide off delicate tissues. - The Whitening Gel
A professional-grade formula — often 25–40% hydrogen peroxide — is carefully applied to each tooth. - Light Activation (Sometimes)
Many offices use a blue LED or laser to accelerate the reaction. You relax for 15–20 minutes per round as the gel foams and works its magic. - Instant Gratification
In about 60–90 minutes, your smile can brighten up to 8 shades. You leave with tangible results and a confidence rush that feels… new. ❤️
Why It Works So Fast
Dentists use stronger ingredients, apply them evenly, and prevent exposure to sensitive areas. The precision and protection make all the difference — especially for people with gum sensitivity or multiple fillings.
💬 “Professional whitening isn’t just about color. It’s about safety and predictability — the peace of mind that your enamel and gums are protected.”
When It’s Worth It
- You’ve got a big event soon (wedding, graduation, reunion).
- You’ve tried strips or LED kits with minimal success.
- You have deep or uneven discoloration.
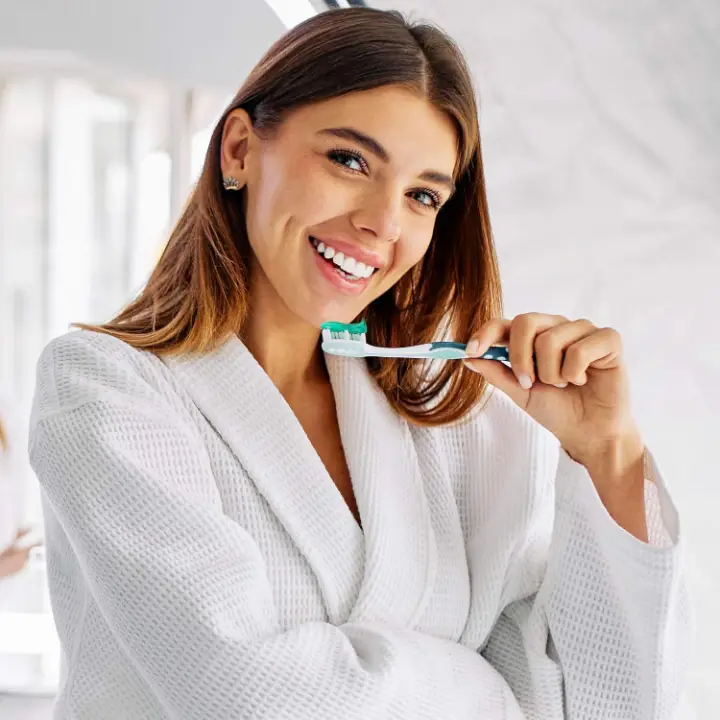
Option #2: The At-Home Whitening Revolution 🏡
Now picture another scene: you’re curled up on the couch, favorite show playing, LED tray glowing softly while you sip water and scroll your phone. Convenience meets control.
At-home whitening has come a long way — it’s no longer a cheap knock-off. Modern formulations and LED systems can genuinely rival dental results when used correctly.
The Main Players
- Whitening Strips:
Budget-friendly, thin plastic strips coated with low-strength peroxide. Great for mild stains, but tricky to apply evenly. - Whitening Trays & Gels:
You fill a tray with gel and wear it for 15–45 minutes. Dentist-made trays fit best, but adjustable “boil-and-bite” versions work decently. - LED Kits:
The new gold standard for home users. They combine whitening gel and blue-light activation. For example, the Auraglow Teeth Whitening Kit delivers a dentist-level experience with consistent, safe results right from your living room. ✨ - Whitening Pens:
Perfect for touch-ups after coffee or before a night out.
The Pros and Cons
✅ Pros:
- Far more affordable.
- Flexible schedule.
- Perfect for maintenance after pro whitening.
⚠️ Cons:
- Requires discipline and correct use.
- Uneven coverage possible.
- Slower to show dramatic change.
Quick Safety Checklist 🧾
- Look for ADA-accepted or dentist-recommended kits.
- Avoid using them if you have open cavities or gum disease.
- Always read duration instructions — longer is not better.
- Pair with a fluoride or desensitizing toothpaste.
The Truth About Sensitivity (and Why It’s Temporary) ⚡
Let’s be honest: that little zing you feel after whitening can be unsettling. But it doesn’t mean your enamel is damaged — it’s just dehydrated.
When peroxide works, it opens microscopic pores in enamel to reach stains. This also temporarily exposes the dentin, where temperature nerves live. Once your enamel rehydrates (usually within 48 hours), those pores close again.
Here’s how to stay comfortable:
- Use a sensitivity toothpaste (potassium nitrate, stannous fluoride).
- Avoid very hot or cold foods for two days.
- Never double up on sessions — overuse is the #1 cause of discomfort.
According to the American Dental Association (ADA), whitening is safe when used as directed under professional guidance.
And yes — enamel naturally remineralizes. The National Institute of Dental and Craniofacial Research (NIDCR) notes that saliva helps neutralize acids and restore minerals like calcium and phosphate to enamel surfaces, strengthening them again.
💧 So that “tingle” is temporary — your smile’s just in recovery mode.
Cost & Confidence: Balancing the Two 💰
For many people, the hardest part of this decision isn’t science — it’s the price tag.
Let’s break it down honestly:
| Type | Typical Cost | Longevity | Worth It If… |
|---|---|---|---|
| In-Office Whitening | $500–$1,500 | 6–12 months | You want instant, high-impact results. |
| At-Home Kits | $20–$200 | 3–6 months | You prefer gradual results and flexibility. |
| Touch-Ups / Maintenance | $30–$75 | Ongoing | You’ve already whitened professionally. |
If professional whitening feels out of reach, you don’t have to give up. Affordable options exist.
A Dental Discount plan can significantly reduce the cost of whitening and other cosmetic procedures — sometimes saving up to 60%. 💙
The key is to see whitening as a confidence investment, not vanity. When you smile freely, you project warmth, approachability, and energy — qualities that affect relationships, careers, and even self-esteem.

The “Who It’s Best For” Decision Table 🌈
| Your Goal | Best Option | Why It Fits You |
|---|---|---|
| “I need fast results for an event.” | Professional Whitening | Quickest, most controlled transformation. |
| “I’m on a budget but want steady progress.” | LED At-Home Kit | Gradual, affordable, convenient. |
| “I just want to maintain my current whiteness.” | Whitening Toothpaste + Pen | Gentle, daily upkeep. |
| “I have deep discoloration.” | Dentist-Supervised Whitening | Strong gel + protection for sensitivity. |
| “I want a natural shade, not bright white.” | Hybrid Approach | Combine one professional session + at-home upkeep. |
Pre-Whitening Checklist: Set Yourself Up for Success ✅
- Get a dental checkup first. Rule out cavities or gum disease.
→ You can easily find a trusted dentist near you. - Fix any existing problems. Whitening with untreated decay = pain.
- Start with a cleaning. Plaque blocks gel contact.
- Choose your target shade. Your dentist can help set realistic goals.
- Pick your method. Decide between in-office, LED kit, or combo.
- Ask questions first. Not ready for a visit? Talk to JustAnswer Dental Experts for personalized advice.
- Follow instructions carefully. Precision = protection.
- Plan maintenance. Avoid dark foods for 48 hours after whitening.
Keeping That Glow: Long-Term Whitening Habits 🌟
Here’s how to keep your smile bright for years — not weeks.
- Adopt the “White Diet” for 2 days post-whitening: light-colored foods (chicken, rice, milk, potatoes).
- Rinse after meals. Water helps flush pigments before they stick.
- Use a straw for coffee or iced tea.
- Brush twice a day and floss daily.
- Try remineralizing toothpaste — look for hydroxyapatite or fluoride formulas.
- Touch up every 6–12 months with a gentle LED session.
Want to explore more? Read our Best Whitening Toothpaste Review for dentist-approved daily care, or our detailed Teeth Whitening Cost Guide for budgeting insights.
Emotional Truth: Your Smile Is More Than Color 💬❤️
Sometimes, whitening isn’t about shade charts or chemistry — it’s about feeling seen.
Many people tell us they start smiling more after whitening. They laugh wider. They take photos without overthinking. That joy is priceless.
But here’s the secret: your smile was already beautiful. Whitening just helps it reflect your confidence.
Whether you book a professional appointment or unwrap an LED kit at home, remember: this isn’t about perfection — it’s about empowerment.
Because when you smile freely, you share warmth with the world. And that’s something no filter or price tag can replace. 🌞
Medical Disclaimer: Content on HiTechDental.info is for educational purposes only and not a substitute for examination or diagnosis by a licensed dentist. If you experience pain, swelling, or urgent dental symptoms, seek professional care immediately.
Affiliate Disclosure: HiTechDental.info participates in affiliate programs (including Amazon and other trusted partners). When you buy through our links, we may earn a small commission — at no extra cost to you. These partnerships help keep our guides accurate, independent, and free for readers.
© 2025 HiTechDental.info | All rights reserved.