You know that feeling when you smile in the mirror and wish your teeth looked just a little brighter? You’re not alone. ✨ Coffee, tea, life — they all leave their marks. But here’s the good news: whitening your teeth safely is easier than ever, and you don’t have to spend a fortune or risk sensitivity to do it.
Let’s have an honest chat — dentist to friend — about what really works, what to avoid, and how to protect that beautiful enamel while you chase your brightest smile. 💙
Why Teeth Get Stained (and Why It’s Really Not Your Fault)
First, take a deep breath. 😊 Stained teeth aren’t a sign of neglect — they’re part of being human. Over the years, enamel naturally thins, and the inner layer, dentin, starts to show through. Add everyday habits, and the color shifts more quickly.
☕ Think of your morning coffee, that comforting glass of red wine, or the occasional curry night — delicious, yes, but full of pigments that love to cling to enamel. Smoking or vaping adds yellow tones too, and even some medications can darken your teeth over time.
And then there’s aging. We earn every laugh line and every tooth tint — both tell a story. According to the National Institute of Dental and Craniofacial Research (NIDCR), excessive fluoride exposure during tooth development can lead to dental fluorosis, a condition that changes the appearance of enamel and may cause internal discoloration.
So, before you feel bad about your smile, remember: this is something we can manage together. 😄
Professional vs. At-Home Whitening — What’s the Real Deal?
That’s one of the biggest questions patients ask us: “Should I do it at the dentist’s office or at home?” 💬
Both paths can lead to a whiter smile, but they’re different journeys. Professional whitening uses stronger gels and precise light activation — quick, powerful, and dentist-supervised. At-home options work slower but fit right into your daily routine (and your budget).
| Whitening Method | Who Applies It | Strength | Speed | Average Cost |
|---|---|---|---|---|
| In-office whitening | Dentist | High (25–40 % peroxide) | 1–2 sessions | $500–$1 000 |
| Custom trays (dentist) | Dentist + home use | Medium (10–20 %) | 1–2 weeks | $300–$600 |
| At-home kits (Snow, LED, strips) | You | Mild (6–12 %) | 2–4 weeks | $50–$200 |
That’s quite a range! If you want instant wow, in-office whitening gives dramatic results fast. But if you prefer gentle and gradual, at-home systems can be just as effective with less sensitivity.
💡 Pro Insight – What Your Dentist Would Say:
“Slow and steady wins the whitening race. The safest results come from consistency, not intensity.”
How Whitening Actually Works 🧪
Let’s demystify the science a bit. Whitening gels use peroxide — hydrogen or carbamide — which releases oxygen. Those tiny oxygen bubbles break stain molecules apart, kind of like a microscopic scrub brush working beneath the surface.
That’s why your teeth look brighter after a few days. But because enamel is porous, some of that oxygen travels inside and can irritate the tooth nerve. That’s what causes sensitivity. 😬
If that’s ever happened to you, look for formulas that include potassium nitrate or fluoride — both calm nerve endings and help remineralize enamel.
And yes — according to the American Dental Association (ADA), teeth whitening is considered safe when done under professional guidance or with products that carry the ADA Seal of Acceptance.
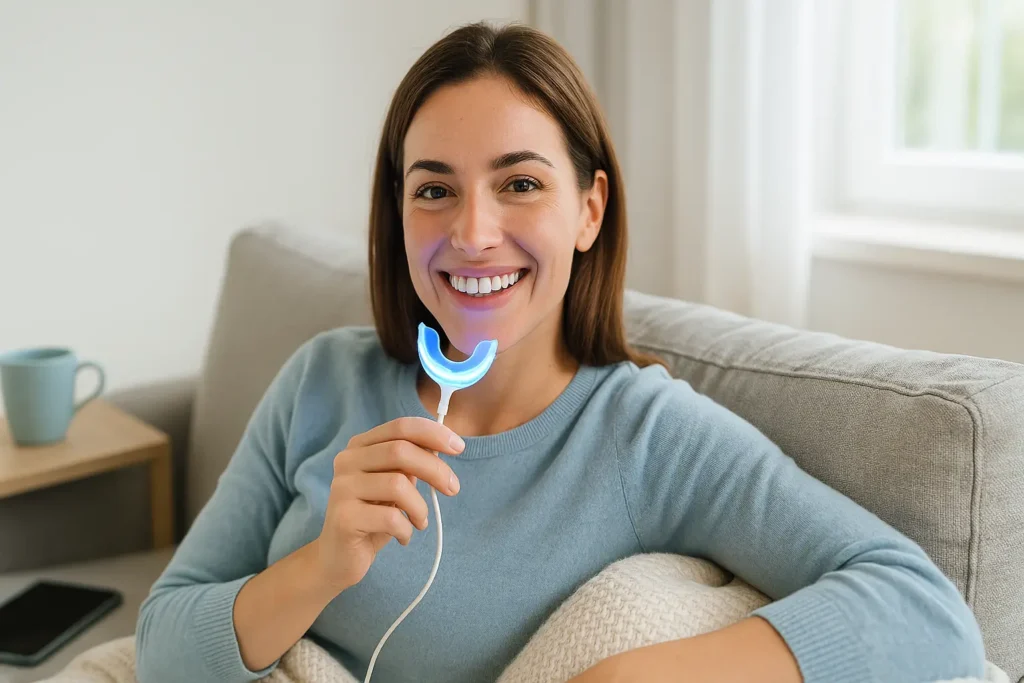
Your Gentle At-Home Whitening Guide 🏠
Here’s a simple routine many patients love because it works and feels comfortable:
- Start clean. Brush and floss so the gel can touch every surface.
- Choose an enamel-safe kit like Snow Teeth Whitening ✨ — dentist-approved and LED-powered.
- Apply evenly, keeping gel off gums.
- Stick to the schedule — usually 10 – 30 minutes per session.
- Rinse well and wait half an hour before eating or drinking.
- Soothe if needed. A desensitizing serum works wonders.
- Protect your progress. Avoid dark foods for 24 hours.
Think of it like training for your smile — a few consistent weeks yield stronger, longer-lasting brightness than any “miracle” one-time fix. 🌟

When to Talk With a Dentist First 👩⚕️
Some discoloration hides deeper than surface stains. Brown or gray patches could mean internal changes, like trauma or old fillings. Whitening can’t fix those — and trying might emphasize uneven color.
So if you’ve got sensitive gums, dental work, or pain, check with a professional before you start.
And if you want quick, expert input from home, you can chat instantly with licensed dentists through Dental Experts on JustAnswer 💬. It’s a safe way to get clarity before beginning your whitening journey.
Myths vs Facts — Let’s Clear the Air ✅
So many myths float around social media! Let’s unpack the big ones.
| Myth | Reality |
|---|---|
| “Whitening ruins enamel.” | Nope. Used properly, it only removes surface stains. Overdoing it can dry enamel temporarily — but that’s reversible. |
| “Baking soda is safe and natural.” | Natural, yes; safe daily, no. It’s abrasive and can wear down enamel. |
| “Once white, always white.” | Unfortunately not. Life brings color back — maintenance matters. |
| “Charcoal toothpaste whitens teeth.” | It polishes, not whitens, and may scratch enamel long-term. |
For a cleaner alternative, some people love LIVFRESH molecular toothpaste, which uses advanced science to dissolve plaque instead of scrubbing. 🧪
If Your Teeth Feel Sensitive After Whitening 😬
Imagine biting into ice cream and getting that sharp zing of pain — ouch! That’s temporary sensitivity from peroxide exposure. Here’s how to calm it down fast:
- Use a sensitivity toothpaste morning and night.
- Swish with a fluoride rinse before bed.
- Skip extra-hot or extra-cold foods for a day.
- Pause whitening until things settle.
You can also apply a remineralizing gel — it’s like moisturizer for your enamel.
If you tend to be sensitive, go for gentle LED kits such as Snow Teeth Whitening or the budget-friendly Teeth Whitening Kit. Both include desensitizing care and ADA-approved safety levels. 😊
Everyday Habits That Keep Teeth Bright ✨
Whitening sets the stage — habits keep the shine.
Do this:
- Sip coffee or soda through a straw.
- Rinse your mouth after staining drinks.
- Snack on crunchy apples or celery to “self-clean.”
- Book cleanings twice a year.
Try to limit:
- Tobacco and dark sauces.
- Over-abrasive DIY mixes like charcoal or baking soda.
If you love a little extra polish, alternate a whitening toothpaste (Auraglow or LIVFRESH) with a fluoride paste to stay balanced.
What Whitening Costs — and How to Choose Wisely 💳
| Option | Average Cost | Duration | Best For |
|---|---|---|---|
| In-office laser whitening | $600 – $1 000 | 1 – 2 years | Instant, dramatic change |
| Dentist take-home trays | $300 – $600 | ~1 year | Controlled brightening |
| Snow Teeth Whitening | $149 avg | 6 – 12 months | Professional strength, home use |
| Teeth Whitening Kit | $59 avg | 3 – 6 months | Affordable maintenance |
| Whitening toothpaste/strips | $10 – $40 | Ongoing | Gentle upkeep |
Money shouldn’t stand between you and confidence. 💙 For detailed local pricing, visit our Teeth Whitening Cost Guide. It breaks down what dentists charge, insurance options, and smart ways to save.
Quick “Bright Smile” Checklist 🧾
✅ Talk to your dentist if you have fillings or sensitivity.
✅ Choose ADA-approved, enamel-safe products.
✅ Stick to directions — no shortcuts.
✅ Stay consistent for lasting shine.
✅ Use fluoride toothpaste afterward.
✅ Cut down staining foods for 24 hours.
✅ Refresh every 6 – 12 months if needed.
Little habits make a big difference. 😊
Beyond Color — The Emotional Spark of a Whiter Smile ❤️
Let’s be honest — whitening is about more than vanity. When you like your smile, you use it more. You laugh louder, speak up in meetings, smile in photos without hesitation. That confidence radiates.
Many patients tell us the real reward isn’t the mirror — it’s how they feel walking into a room. That’s why we see whitening as self-care, not cosmetics. Smiling triggers endorphins, those “feel-good” brain chemicals that reduce stress. 🌈
So, this isn’t just about brightness — it’s about joy.
When Whitening Isn’t Enough (and That’s Okay)
If stains come from inside the tooth or from restorations, whitening alone might not cut it. But dentistry has beautiful solutions:
- Bonding for small spots or chips.
- Veneers for full-smile makeovers.
- Clear aligners to straighten and enhance light reflection.
You can explore gentle options in our Best At-Home Whitening for Sensitive Teeth guide. It’s full of ideas for combining whitening with other smile-boosting care. 😄
A Final Thought 💬
If you take one thing from this guide, let it be this: your smile doesn’t have to be perfect to be powerful. Every grin tells a story — of confidence, warmth, and self-love.
Whether you brighten with your dentist or use a trusted home kit, do it kindly and safely. Keep caring for those teeth that help you speak, laugh, and share life.
Because you deserve to feel good every single time you smile. 😊💙
Medical Disclaimer: Content on HiTechDental.info is for educational purposes only and not a substitute for examination or diagnosis by a licensed dentist. If you experience pain, swelling, or urgent dental symptoms, seek professional care immediately 🦷.
Affiliate Disclosure: HiTechDental.info participates in affiliate programs (including Amazon and other trusted partners). When you buy through our links, we may earn a small commission — at no extra cost to you ❤️. These partnerships keep our guides accurate, independent, and free for readers.
© 2025 HiTechDental.info | All rights reserved.